From the intricate mechanisms in machinery to the simple tools we use in our everyday…

How are toggle clamps measured?
Toggle clamps, the unsung heroes of the manufacturing floor, serve a pivotal function in various industrial applications. As intricate devices, they efficiently hold workpieces in a steadfast position. The ability to deliver consistent and steadfast holding capacity often hinges on accurate measurements.
The industrial sector relies heavily on these mechanisms. Their primary use includes holding large machinery parts during welding or machining, ensuring there’s no movement, and guaranteeing precision throughout. Their applicability spans multiple industries, from automobile manufacturing to heavy-duty metal processing plants.

Differentiating Between Toggle Clamp Types
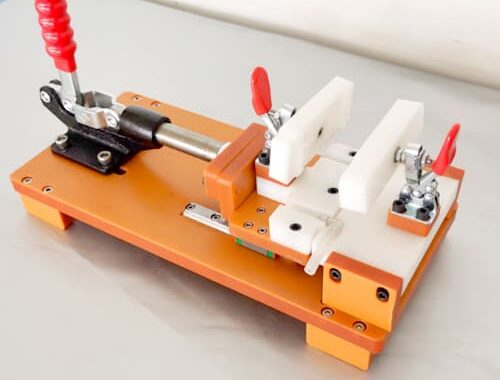
In the realm of industry, understanding the nuances between toggle clamp types is paramount. Hold-down clamps excel in providing downward pressure, ensuring workpieces remain immobile during machining. Push-pull clamps, as the name suggests, function by pushing or pulling the workpiece, maintaining its stability. Lastly, latch type clamps act like door latches, best for operations where a locking mechanism is pivotal.
Essential Components and Their Role in Measurements
To truly grasp the intricacies of measuring toggle clamps, it’s imperative to be familiar with their foundational components. The handle, often the most visible part, offers the user direct control over the clamp’s pressure and position. The clamping arm, vital for holding the workpiece, plays a role in determining the clamp’s capacity. Meanwhile, the base plate ensures stability, offering a solid foundation for the entire operation.

The Clamping Force: What It Is and Why It Matters
A linchpin of any clamping operation, the clamping force refers to the pressure exerted to hold a workpiece in position. This force ensures there’s no slippage or movement during operations. Factors affecting this force are multifaceted, including the type of clamp, material being clamped, and even the expertise of the operator.
The Holding Capacity: The Core of Toggle Clamp Efficiency
Holding capacity epitomizes a toggle clamp’s efficiency. It quantifies how much load the clamp can handle without faltering. Various measuring techniques are employed to ascertain this, with both digital and analog tools at the forefront. Accurate measurements ensure both operator safety and impeccable product quality.

Bar Opening and Bar Swing: Distinguishing Between Their Roles
In the industrial orchestra, bar opening and bar swing play unique yet complementary roles. While bar opening denotes the maximum distance the clamp opens to accommodate a workpiece, bar swing references the arc the handle travels to secure or release a workpiece. These parameters impact speed and efficiency on the factory floor.
Traditional Measurement Tools vs. Modern Digital Tools
The old meets the new when it comes to measuring toggle clamps. Traditional tools, like calipers and gauges, offer tactile feedback and have been trusted for decades. On the other hand, modern digital tools offer precision and data storage capabilities, often enhancing the accuracy of measurements.
Ensuring Accuracy: Tips for Precise Measurements
Accuracy in measurement is non-negotiable. Ensuring that tools are used correctly, regularly calibrated, and protected from environmental factors is pivotal. Being aware of common pitfalls, such as tool wear and tear or operator error, helps maintain the integrity of measurements.

The Calibration Process: An Essential Step
Instrument calibration isn’t just a protocol; it’s an imperative. It ensures that measurement tools yield accurate results consistently. Regularly scheduled calibration, depending on tool usage and manufacturer recommendations, safeguards against potential inaccuracies.
Consequences of Using Uncalibrated Instruments in Toggle Clamp Measurements
Uncalibrated instruments in the world of toggle clamps can spell disaster. They can lead to erroneous measurements, which in turn can result in subpar product quality, equipment damage, or even safety hazards on the shop floor.
Why Tolerances are Critical in the Industrial Sector
Tolerance, the permissible limit of variation, stands as a cornerstone in the industrial sector. It’s an acknowledgment that no manufacturing process is perfect. Ensuring that deviations remain within set boundaries guarantees product quality and operational safety.

Setting the Right Tolerance: A Balance Between Precision and Flexibility
Striking a balance between precision and flexibility often requires a keen understanding of both the machinery in use and the end goal. While tight tolerances promise high precision, they might not always be feasible or cost-effective. Hence, setting the right tolerance is as much an art as it is a science.
Overcoming Environmental Factors that Can Affect Measurements
Environmental parameters, including temperature and humidity, can skew measurements. Being cognizant of these factors and making necessary adjustments or choosing the right environment for measurements is crucial for accuracy.

Addressing Wear and Tear: How Frequent Use Can Impact Measurements
Constant use subjects toggle clamps to wear and tear. This natural degradation, if not accounted for, can lead to inaccurate measurements. Regular inspections and timely replacements ensure that measurements remain spot on.
Conclusion
As the industrial landscape evolves, the importance of precise toggle clamp measurements cannot be overstated. These measurements dictate everything from product quality to operational safety. As industries march towards automation and heightened precision, the role of these humble toggle clamps and their accurate measurements will only become more pronounced.
You might also be interested:


This Post Has 0 Comments